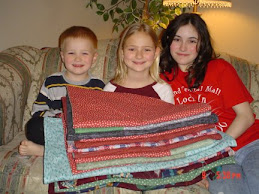
Photo 1: Your piece of fabric and no it doesn't have to square, retangle .... whatever size you have. This piece is approximately 1/2 yard.
 Photo 2: Fold piece over in order to get a true bias. Now I press mine to get the fold.
Photo 3: Cut on the fold using a ruler and rotary cutter.

Photo 4: Take the right piece you cut off above and placed it next to the left edge. You're going to sew the two pieces together.

Photo 5: Sew the two edges together. I like to use a 3/8" seam but use whatever you like.

Photo 6: Press the seam open.

Photo 7: Now on each edge (top/bottom) draw a 1/4" line.

Photo 8: I like for my bias to be 2 1/2". I draw using my ruler from the edge 2 1/2" across the fabric.

Photo 9:

Photo 10: When I get to the right edge of the piece I cut away the excess.

Photo 11: At the top left edge I number the 2 1/2" markings starting with ZERO .... number all the way across. Now the bottom left edge I start the number with ONE ... number all the way across.

Photo 12: Matching the numbers of the top edge and the bottom edge (one to one, two to two) I pin.

Photo 13: The sew on the original line you mark in photo #7. You now have a tube.

Photo 14: Press that seam open ...

Photo 15:

Photo 16: Place the tube over your arm, using scissors cut on the lines you drew in photo 8.

Photo 17

Photo 18: You have a bunch of bias binding done in the round.

Photo 19: Take your binding to the ironing board and press

Photo 20: My almost 1/2 yard fabric yielded 15 1/2 yard of bias binding. YIPPEEEEEEE Feel free to ask questions. I suggest that you print out Shelley's instructions
DISCLAIMER: The photos are mine BUT the instructions I used belong to a friend, Shelley. Check out her website.

Photo 5: Sew the two edges together. I like to use a 3/8" seam but use whatever you like.

Photo 6: Press the seam open.

Photo 7: Now on each edge (top/bottom) draw a 1/4" line.

Photo 8: I like for my bias to be 2 1/2". I draw using my ruler from the edge 2 1/2" across the fabric.

Photo 9:

Photo 10: When I get to the right edge of the piece I cut away the excess.

Photo 11: At the top left edge I number the 2 1/2" markings starting with ZERO .... number all the way across. Now the bottom left edge I start the number with ONE ... number all the way across.

Photo 12: Matching the numbers of the top edge and the bottom edge (one to one, two to two) I pin.

Photo 13: The sew on the original line you mark in photo #7. You now have a tube.

Photo 14: Press that seam open ...

Photo 15:

Photo 16: Place the tube over your arm, using scissors cut on the lines you drew in photo 8.

Photo 17

Photo 18: You have a bunch of bias binding done in the round.

Photo 19: Take your binding to the ironing board and press

Photo 20: My almost 1/2 yard fabric yielded 15 1/2 yard of bias binding. YIPPEEEEEEE
 Feel free to ask questions. I suggest that you print out Shelley's instructions
DISCLAIMER: The photos are mine BUT the instructions I used belong to a friend, Shelley. Check out her website.